Friday, December 9, 2011

Have Yourself a Merry Little...Thanksgiving

The week after Thanksgiving, Kyle and I decided that we should take advantage of the after-Thanksgiving turkey sales at the grocery store.  So, we did. We bought a BIG frozen turkey. It was 50% off. We were pumped!

Since we always celebrate Thanksgiving with our families, we decided we would celebrate our own Thanksgiving & cook our own turkey. (Something we have never done before!)

So here is our feast. 
I forgot to mention that we watched Christmas Vacation while we cooked. Classic!


Yum. Yum!


Everyone knows that after you cook a turkey on Thanksgiving, you have TONS of leftovers. Well, this was the case for us too! Except there were only 2 of us to eat the rest of the turkey, ha.

I like to eat turkey, but when you eat it the same way for 7 meals in a row...I got a little tired of it!

So, I experimented with some recipes and came up with some delicious leftover turkey meals.
(FYI: The first recipe was the husband's absolute favorite. It was a big hit.)
I found it online, here.

Turkey Pot Pie

Ingredients:
Pre-made double pie crust (10 inch)
4 tbsp butter
1 small onion, minced
2 stalks celery, chopped (I used 3)
2 carrots, diced (I used 3)
3 tbsp dried parsley
1 tsp dried oregano
salt & pepper to taste
2 cubes chicken bouillon
3 cups water (I used 2 cups water/1 cup of chicken broth)
3 potatoes, peeled and cubed
1 1/2 cups cooked turkey, cubed
3 tbsp flour
1 cup milk

Directions:
1. Preheat oven to 425 degrees F. Roll out bottom pie crust and place in the 10 inch pie pan.  Place bottom pie crust in oven for 5 minutes to "pre-cook"
2. Place 2 tbsp of the butter in a large skillet.  Add the onion, celery, carrots, parsley, oregano, salt & pepper. Cook and stir until the veggies are soft. Stir in the boullon and water.  Bring mixture to a boil.
3. Place potatoes in microwave for 2 minutes to soften.  Then add to the mixture.  Stir in potatoes, and cook until tender but still firm.
4. In medium saucepan, melt the remaining 2 tbsp butter. Stir in the turkey and flour.  Add the milk, heat through. 
5. Stir the turkey mix into the veggie mix, and cook until thickened.
6. Pour mixture into the "pre-baked" bottom pie shell. Roll out the top crust, and place on top of filling.  Flute edges and make 4 slits in the top to let out steam.
7. Bake in the preheated oven for 15 minutes.
8. Reduce oven temperature to 350 degrees F and continue baking for 20 minutes, or until crust is golden brown.

**The ingredients make more than enough "filling" for one pie.  I used the extra "filling" to make a mini pie & used crescent rolls to top. Then, I baked it until golden brown & hubby took it for lunch the next day!


The next recipe, I saw on t.v. while I was watching the Macy's Thanksgiving Day parade.  I have no idea if it is online-(I'm sure it is somewhere)- but, I just remembered what the chef said on t.v. and attempted it myself! They were also delicious.


Crescent Roll Turkey Squares


Ingredients:
1 roll of crescent rolls
basil pesto
Italian blend/Mozzerella cheese
Turkey strips
Sliced Tomatos


Directions:
1. Spray 13x9 inch pan. Spread crescent rolls out flat. Spread basil pesto sauce on top of crescent rolls.
2.  Shred turkey into small strips. Place on top of basil pesto.  Cover entire pan with turkey.
3. Cover turkey with cheese and lots of it! :)
4.  Slice tomatoes and place on top of cheese. Sprinkle a little more cheese on top of tomatoes.
5. Bake in oven at about 375 degrees F for 10 to 12 minutes.
6. Slice into squares & enjoy!


Yum! I'll definitely be saving these recipes for next year. Hope you enjoyed them!

Friday, December 2, 2011

Soon-to-be HOMEOWNERS!

I've been waiting for so long to announce that...we're buying our first HOUSE!!!
We absolutely love it & are beyond excited about having the opportunity of owning a home. It's definitely a dream come true! We never imagined that the Lord would bless us with such a beautiful place to call "home" & in the perfect area, too!

One of the most important aspects of the house is that it is a bike ride away from White Rock Lake in Dallas and in a beautiful neighborhood full of trees and hills. We looked at a handful of other homes as well, and when we saw this one--we knew pretty quickly that this one fit us the best!

A few facts:
 Built in 1962
It has 3 bedrooms, 2 baths,
2 car garage that is attached
The kitchen/family room/living room have an open floor plan - which will be perfect for having friends over :)
There's a pantry in the kitchen
It has a laundry room...yay!
It has a fireplace!
All hardwood floors
 There are FOUR huge, walk-in closets
Cute built-in bookshelves
It has a backyard
It has a huge tree in the front yard & pretty landscaping
 Everything is in beautiful condition, lots of new appliances & updates
There are still some "projects" that we will want to take on one day...but, for now it's perfect

{big tree in front}

We signed the contract on November 9 and have been learning all about the process of buying a house since then!
We settled on a final offer with the sellers,
had an inspection completed on the house,
a few minor repairs are being completed at this time,
Kyle has taken on a huge role & has been working on getting us Homeowners Insurance and Home Warranty Insurance,
we close on December 30!
After that, we will be "Landlords" for a week. Hmm..should be fun.
We will officially get the keys & begin moving in on January 8th!
We've learned that buying a house is a LOT of work.
We knew that it would be going into it, but it's a crazy ride through it all!


The week before Thanksgiving, Kyle's parents came to visit us and Chris & Jodi (my brother-in-law & sister-in-law that live in Dallas, too!) My parents were on their way to the Baylor/OU game in Waco that day. So on their way from Abilene, they decided to swing by Dallas to see everyone!  
(Sidenote: Dallas isn't really on the way from Abilene to Waco, in fact, it is probably an additional 2 hours out of the way- my parents are just that great!)
Since both sets of our parents would be here, we called up our sweet realtor, Debbie, who arranged for us to see the house altogether! We had a blast. Both of our parents are supportive and have been sharing in our excitment throughout the process!


We can't wait for December 30th to come. Until then, we're enjoying our last month in our 600 square foot apartment. Ha..we're counting down the days until the move!

At the end of the day, in the middle of the insane amount of paperwork & other meticulous things that go into buying a house, we're looking forward to creating priceless memories in our soon-to-be home!
God has been so gracious to bless us with this opportunity.
It is our hope & prayer that our home will be a place filled with unconditional love,
overflowing joy & a peace that surpasses all understanding...
...that God would be the rock and foundation...
and that he would receive the glory through it all!

 "God’s solid foundation stands firm.." 2 Timothy 2:19

Thursday, November 24, 2011

Happy Turkey Day!

Happy Thanksgiving Everyone!

A few fun Fall activities from this week....

DIY Fall Wreath!


We made Oreo Turkeys in therapy this week! :)

"I will give thanks to you, Lord, with all my heart;
I will tell of all your wonderful deeds.
I will be glad and rejoice in you;
I will sing the praises of your name, O Most High."
Psalm 9:1-2

Monday, November 21, 2011

Help support an Ethiopian Adoption!

I recently purchased these incredibly cute, creative & personalized journals to support one of the most wonderful families that I know!


The Porters are a family that started the company that I work for, Cornerstone Pediatric Therapy. The husband & wife, Craig and Jamey are incredible people to work for and lead our team in such a Godly way. They have 5 beautiful children! The youngest of the 5 was adopted at the beginning of 2011 from Ethiopia, her name is Mary Aster and she is absolutely precious.


This sweet family has such a big heart for God's children. So big that they are currently raising the money to adopt, in the Lord's perfect timing, another child from Ethiopia!

Craig, Jamey & their children need YOUR help to bring home their next child from Ethiopia!

Currently, they are fundraising to help raise money for this next adoption. Craig and Jamey's oldest daughter is making and selling beautiful necklaces with an authentic Ethiopian cross.


Also, one of the Porter family members owns http://www.papersunday.com/ where she prints personalized scripture journals.  These journals are personalized with your name and encouraging bible verses on each page! I've never seen anything like them before. 


When you order a journal, type "Porterkids" in the referral line to support this adoption! 

 These items would make an incredible Christmas gift for a family member or friend. :)
Please consider supporting the Porter's through participating in their fundraiser and through prayer!


{Mary Aster}


"For I know the plans I have for you," declares the Lord," plans to prosper you and not to harm you, plans to give you a hope and a future
Then you will call on me and come and pray to me,
and I will listen to you.
  You will seek me and find me when you seek me with all your heart."  
Jeremiah 29:11-13

Wednesday, October 26, 2011

Job Update & Pumpkin Cookies

Hello to my Long Lost Blog! It's been quite a while since I jumped online to upload pictures & write a post. Life has been super busy. My job(s) have picked up quite a bit...

Just a quick job update: I am currently working at a Pediatric Home Health company in Dallas called Cornerstone Pediatric Therapy. (It's a GREAT place to work, by the way!) If there are any SLP's out there looking for a job-- let me know, I'd love to chat with ya! At Cornerstone, I work with children and help strengthen their skills in a variety of areas ranging from articulation, auditory processing, language, and many other parts of speech therapy! I I absolutely love working with my sweet kiddos & families each day.  I also recently picked up a PRN position at Baylor Medical Center at Garland.  PRN basically means "as needed" so I pick up shifts on Fridays and randomly during the weekends to help out the other speech therapists.  At the hospital, we typically work with older adults in the Acute and Inpatient Rehab setttings.  Here, I am able to work with patients in areas such as: dysphagia (swallowing), language, speech, cognition (problem solving, safety awareness, memory, etc.) So, as you can imagine...my weekly schedule has picked up a little QUITE a bit! :) It's all so much fun, though. I'm just becoming a very busy lady! Right now, I'm glad to say that I'm at the time of my life where I'm grateful to be working as much as I am. I feel extremely blessed knowing that I have 2 jobs where I am able to interact with wonderful people on a daily basis.   I'm sure one day, I will want to cut back on work a bit when kiddos enter the picture (Lord willing!! I can't wait!), but for now..I know I am right where God has me for such a time as this.  So, that is that.  A little update for my few blog readers. (thanks for reading, Mom!)

Okay, now for the YUMMY part of this post.....

My mother-in-law makes the most delicious pumpkin recipes!
Pumpkin Cookies are one of our favorites in the Phillip household, so I thought I'd share a little festive fall treat with you all. ENJOY!


Pumpkin Cookie Recipe
Cream together in mixer:
2 cups sugar
2 cups margarine

Add:
1 16oz. can pumpkin
2 tsp. vanilla extract
2 eggs

Sift together & then add to creamed mixture:
4 cups flour
1 tsp. baking soda
1 tsp. baking powder
2 tsp. cinnamon
2 tsp. nutmeg
1/2 tsp. allspice
1 tsp. salt

Optional:
1 cup chopped walnuts
1 cup raisins

Drop by the teaspoon full on cookie sheet and bake 8 to 10 mintues at 350 degrees. Let cookies cool. Frost cookies with powdered sugaror cream cheese icing. Place candy pumpkin or candy corn on top. :)

Tuesday, September 27, 2011

No Sew Bunting/Banner Tutorial

 A few weeks ago, I had the lovely opportunity to help celebrate a very special friend. She is having her first baby in December and it is a girl! For the shower, I wanted to make something personal for Baby Annalee & something that maybe could be used in her nursery!

This is what I came up with! A personalized "bunting banner". You can see the rest of the pictures from the darling shower, here!


To make your own personalized banner (no sew style!), you will need the following:
Fabric Scraps
Hot glue gun
Spray Adhesive
Cardstock paper
Scissors

Let me begin by saying that if you have a super cool tool like a "Cricut," this project would probably be less time consuming. However, I don't have anything like that..so this was the easiest way for me. :)

To begin, iron all fabric.

Cut a triangle out of the cardstock. I free handed it..I don't measure. Ha! So, goodluck!
Then, cut the rest of your triangles.  You can make as many as you want.  Just make sure they are all the same size.


To begin on the first triangle, you will cut 2 triangles out of your fabric: 1 big and 1 the same size as paper cut traingle.

Cut the fabric to fit just over the paper. 
 It doesn't have to be perfect, because it will be covered up on the sides. 
 This will be the back of the banner.

Then cut a fabric triangle a little bit bigger than the previous fabric triangle.
Place it face down and cover with the paper and fabric triangle.
This will be the front of the banner.

If my directions don't make sense, maybe this picture will help. :)

Place hot glue on one side of triangle in the crease. Fold over fabric and hold.

Continue this step for the other two sides until complete!

Now for the letters...

To begin, I chose a font I liked on Microsoft Word.
I increased the size to 250 and printed it. Then I cut out the letters.  

Next, I taped the letters onto the fabric.
Then, I cut the letters out. Sounds hard, but it was pretty easy!


After that, I peeled the taped paper letter off of the fabric.

And finally, I had myself a fabric letter!
You made need to trim the edges. My fabric frayed a little, but it looked great after I trimmed it.  If you're going for a vintage look, you may like and want to keep the "frayed look."


I used the Elmer's Craft Bond Spray Adhesive to "glue" the fabric letter to the bunting.  Tip: You may want to use the spray adhesive outside over some scrap paper because the spray makes everything sticky!

You will end up with this!

Choose a ribbon you like and hot glue the back of the fabric triangles to the ribbon & you've got yourself a bunting banner!


"Annalee Ray"
This is the combo of lots of people's names in their family.
I love meaningful names!


Do you think YOU could make your own No Sew Bunting/Banner? I think so!

Monday, September 19, 2011

Baby Annalee's Shower!

This past weekend, we traveled to Abilene to celebrate one of my most wonderful childhood friends & her sweet baby girl who will be born in December! Ashlee is married to Dallas (who is also a childhood friend!), they live in the Houston area & have an adorable blog,  here! :)

I had the privilege to help plan the baby shower for Ashlee with another sweet childhood friend, Mrs. Kelsey Holson.  With the help of our moms and many other sweet ladies, we had a blast putting it all together!

I just can't wait for little Miss Annalee Ray to arrive. :)


 I just LOVE the way her banner turned out!
I'll be giving a tutorial on my "No-Sew Bunting" banner soon. Stay tuned!

 Kelsey made this adorable picture display of Annalee's Mommy & Daddy when they were babies! 

I wonder who she will resemble?

 Mom and I had a blast making white chocolate covered popcorn & assembling these adorable "Ready to Pop" bags! I found the idea, here, but I couldn't find the exact bags. So, we decided to make our own! Hobby Lobby had these polka-dot bags and we designed the "Ready to Pop" logo.


 Kelsey & her mom made individual "Cake in a Jar" for all of the guests! They turned out so cute.  I'm not sure where she found the idea, but I'm sure you can find it on Pintrest somewhere!

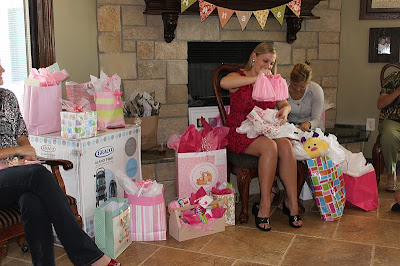
 Here is Ashlee opening gifts! She got so many precious things!


 Here is another craft project I had fun making for little Annalee.  Michaels was selling these baby clothes hangers for a $1.25. I snatched 3 of them and also purchased some pink letter stickers to write her name on the hangers.  Then, I used modge podge to make sure the stickers will stay on! It was a great  personalized, but super afforable & adorable gift. :)

 And, Annalee got Texas aTm booties....I'm shocked. Sic' em Annalee. :)

 The sweetest canvas painting to hang in her nursery...
 Annalee Ray, you are the cutest little love bug! Can't wait to meet you!

It was so fun to see these amazing girls--it's been way too long!

Thinking about the miracle of a child reminds me of an encouraging verse that I love so deeply.  It's so important to remember that we were made perfectly in the Lord's sight. Here's a little reminder of that...

"For you created my inmost being; 
you knit me together in my mother's womb. 
I praise you because I am fearfully and wonderfully made; 
your works are wonderful, 
I know that full well."

Psalm 139: 13-14